
More than a year after Half-Life: Alyx’s release and nearly a year after we started active development (Our anniversary is June 12th!), we’ve reached several milestones and grown immensely as a team. So much so, in fact, that we’ve decided to open up to the community and give you a behind-the-scenes look at everything we’ve been doing! This will be a more technical look at everything for people who may be interested in our processes, or even joining our team.
However that’s not to say we don’t have much prettier things in store to show very, very soon. Without further ado — let’s get to it!
DevOps
Written By MDDBULLDOGG, Team Lead & Level Design
One of the biggest challenges we had to overcome as a team was the integration of the existing HL2:RA and Project 17 workflows, which themselves took several iterations to sort out. After much iteration, we came out of it for the better, taking the best parts of everything we tried to create a process that works best for us. Ultimately we’ve ended up adopting a workflow that most closely resembles a process called ‘Agile Development’. Now I know the software developers among us are wincing at the phrase but don’t worry- there’s no crazy Scrum Masters or Project Owners to contend with here!
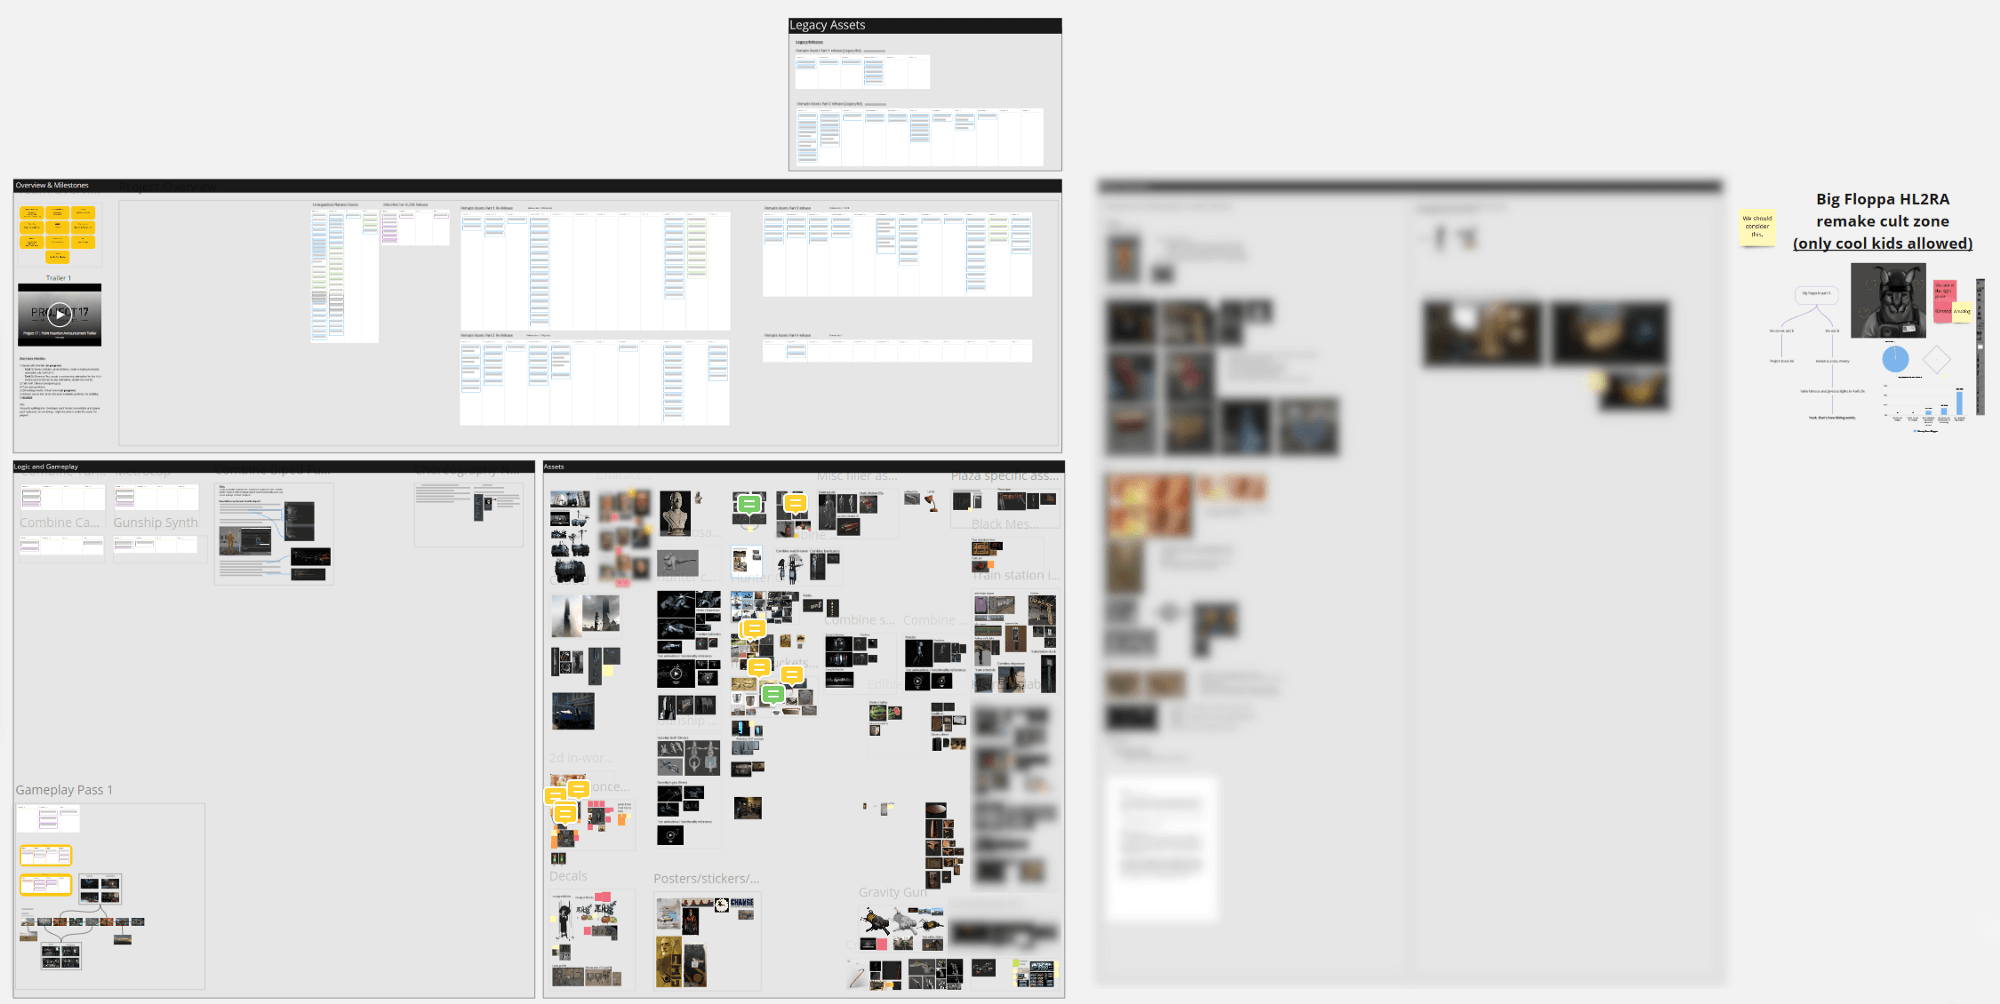
For those of you who aren’t familiar with the term, Agile usually means something entirely different from team to team. However, it generally follows the idea that development is a somewhat fluid (see: agile) process that focuses on iteration in smaller steps. I won’t bore you with the specifics but in our case it means we’re mostly self-organized, with a list of tasks sorted by priority that developers then pick up as they see fit. We are still hobbyists after all, and as such we don’t have set working schedules or hours. Software that you typically see in use with this sort of workflow might be Jira or Azure DevOps. As a team we seem to have found a comfortable middle ground using a free software called Miro to track our tasks.
Ultimately, what all of this means is that our team’s organization has matured enough that we’re much more comfortable in how quickly we can deliver content to the community, and grow our team without needing to overcome huge hurdles during the on-boarding process. In the future, you can expect to see us deliver content much quicker than this first cycle has taken us, at a much higher quality bar.
Parts 1 and 2 Refactors
Written By MDDBULLDOGG, Team Lead & Level Design
One of the very first things we took a look at when the HL2:RA and Project 17 teams began working together was how we could improve both projects based on feedback from each other. A hot topic of discussion here was regarding the assets already released as part of HL2:RA Parts 1 and 2. After several weeks of discussion, it was decided that we could vastly increase the quality and functionality of these assets using the knowledge that was gleamed during the creation of our respective projects.
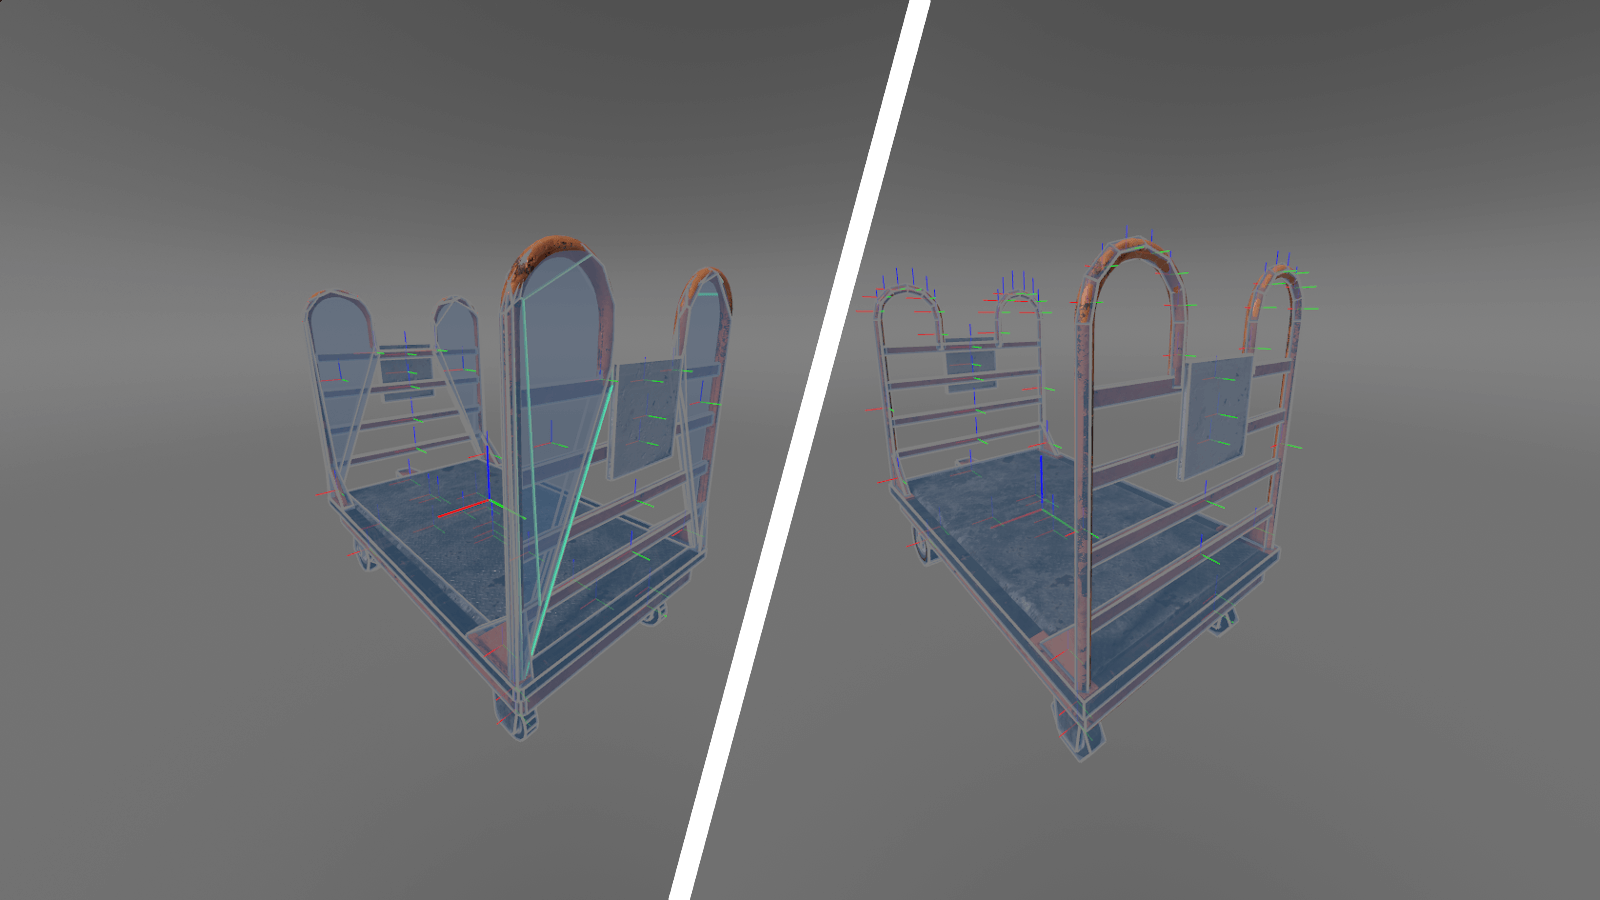
While refactoring our Part 1 and 2 assets, our highest priority was, by far, fixing bugs and issues that were present in the existing assets. Inaccurate or oversimplified physics meshes were made more manageable and predictable, while model parameters such as weight and surface properties were adjusted to be more accurate to each asset. Generally, just making these assets easier for developers to use, in a way that provides expected results. This entire process was aided by several talented individuals hand-picked from among the Half-Life: Alyx modding community, providing invaluable feedback for each of our assets as they implemented them in their own projects. Look forward to seeing our updated assets among their releases!
Next stop on our list of priorities was to enhance functionality that might have already existed for our assets, or create functionality that we felt would be useful to the community. For example, some assets were split up to allow for more developer customization, while others still had entirely new functionality added to them. While this process wasn’t always the smoothest, the added functionality is certainly a blast to play around with in the tools!
A huge piece of adding built-in functionality to the packs was taking a second look at all of our file structures and determining if they filled our criteria for what we wanted to deliver. In the end, our previous file structure was reorganized in such a way that they mimic the directories used in the original games, where applicable. While this was a huge undertaking, it now means that you can port over old maps that use Half-Life 2 assets and Source 2 will pick up their directories, automatically replacing them with remastered assets for you! Going forward, this automatic replacement will be a huge priority for us, especially as we start looking forward to supporting S&box.
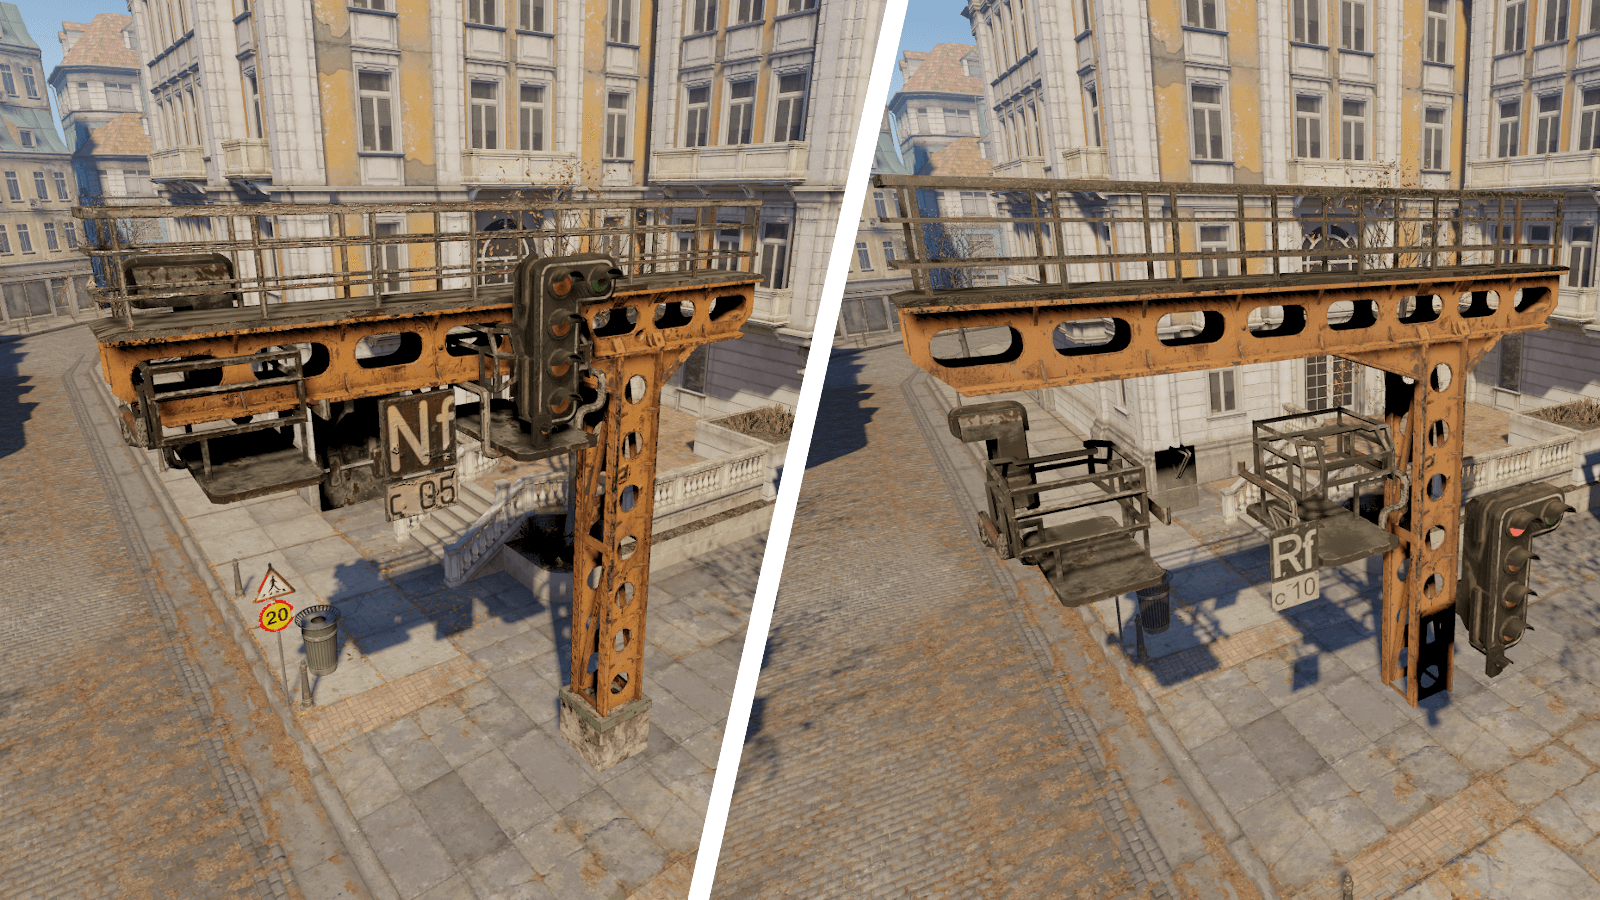
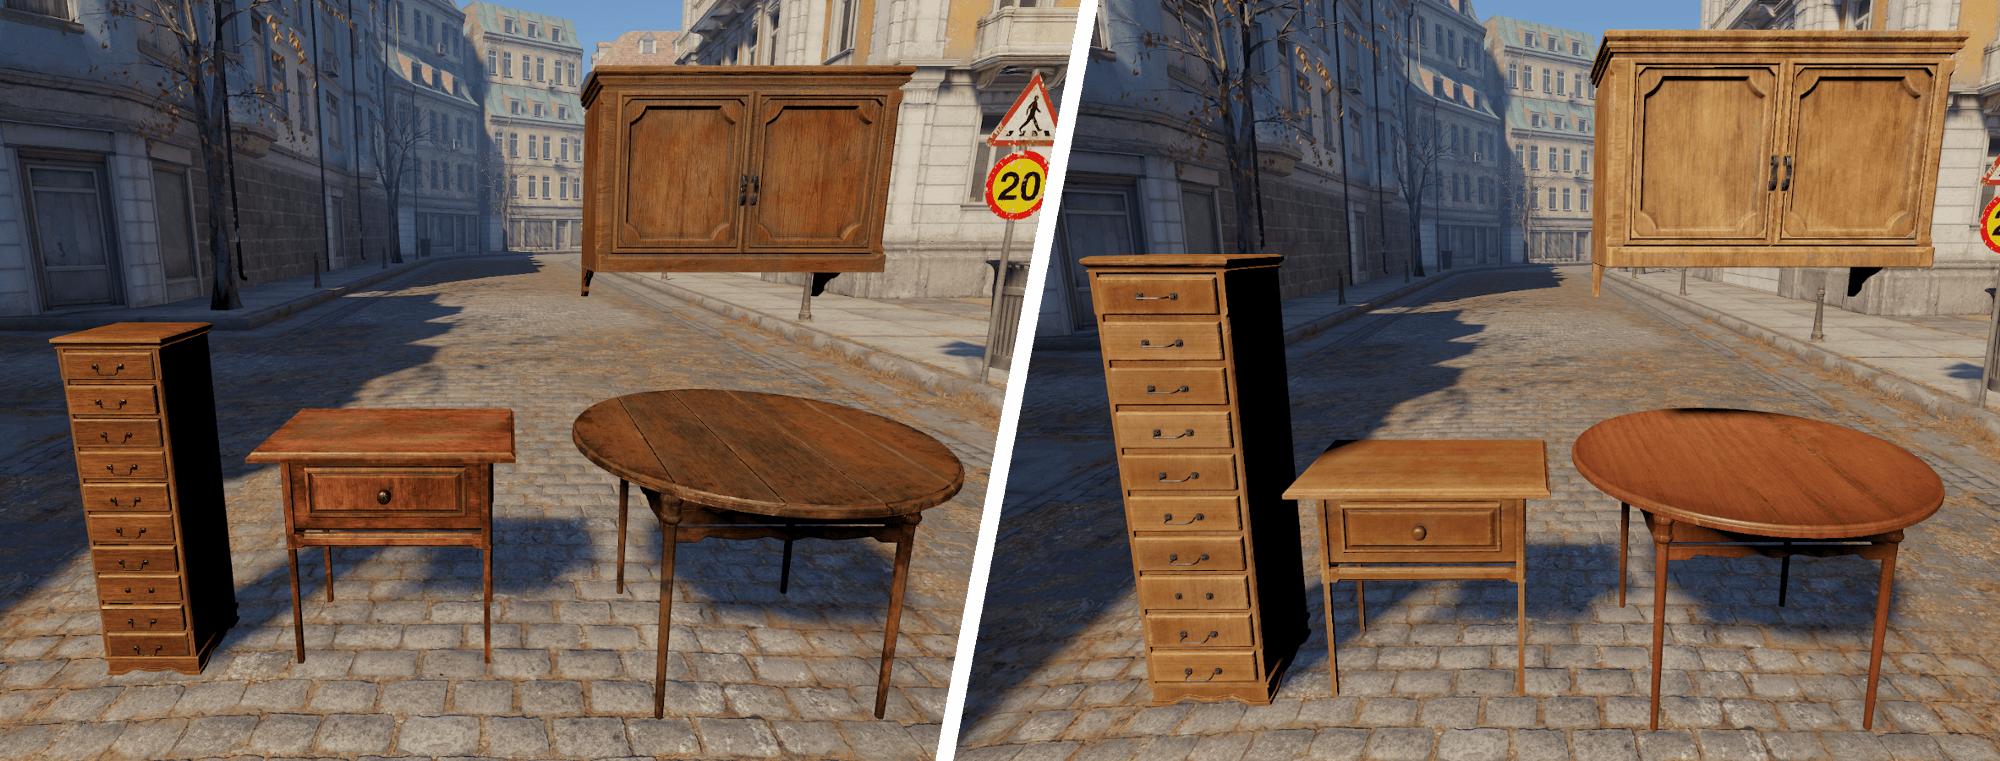
Last but most certainly not least: Visuals. When looking back at our assets with the advantage of hindsight, we saw a huge opportunity to give everything a final visual pass using the knowledge we gained from our first release. Having learned our way around Source 2 and it’s new workflow as compared to Source 1, we felt compelled to put our newfound knowledge to good use. It’s hard to do these improvements justice with words, so I’ll let the pictures do the talking!
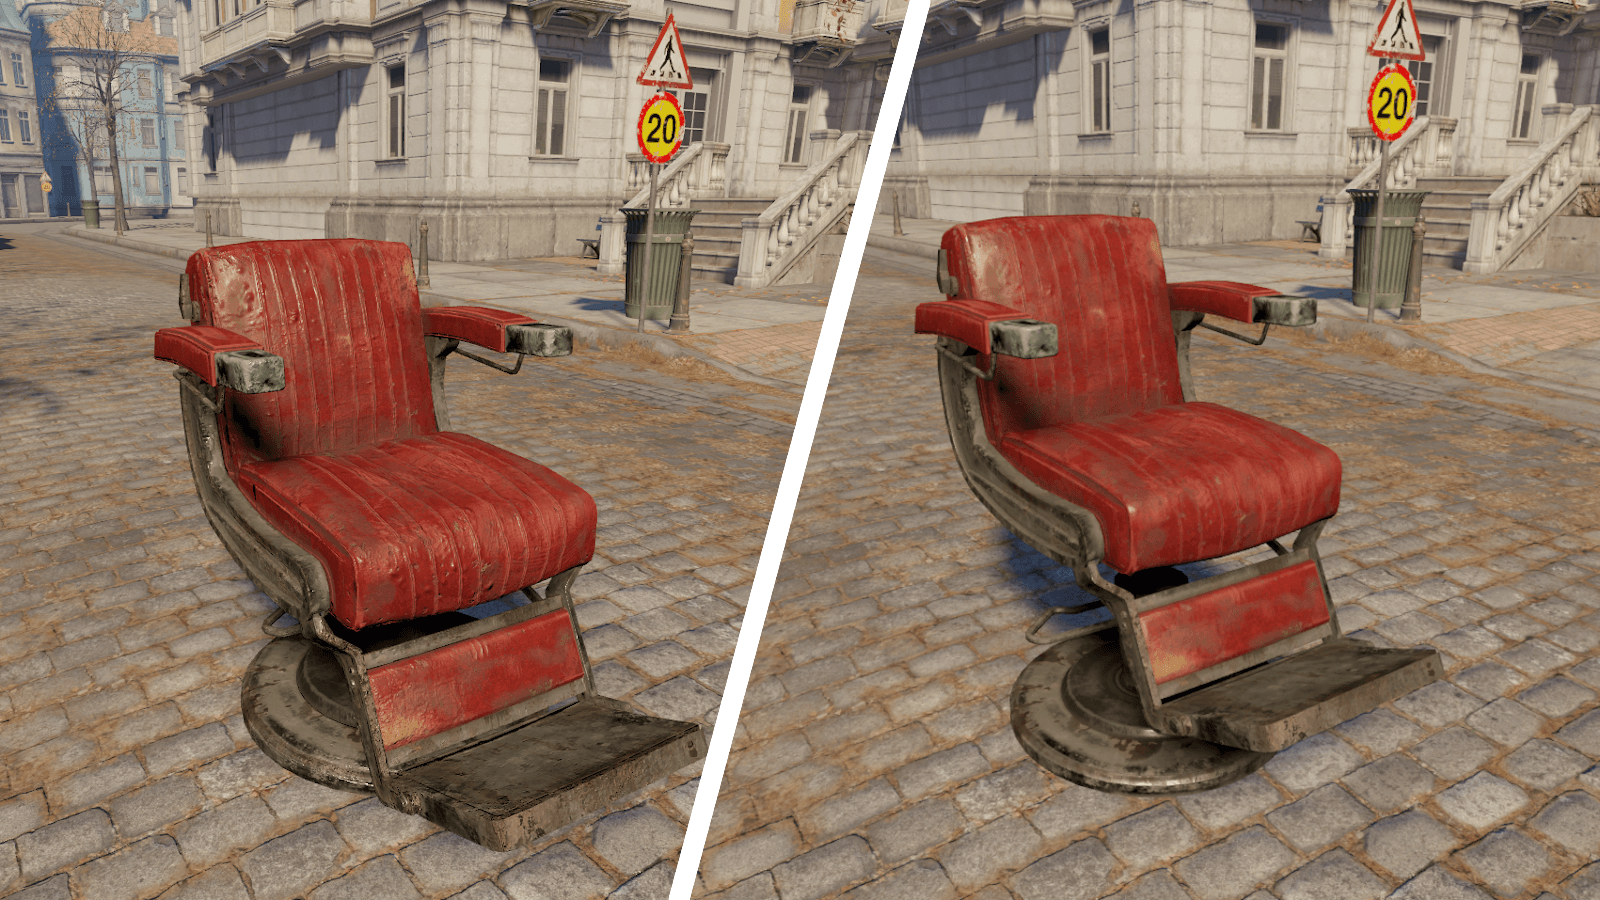
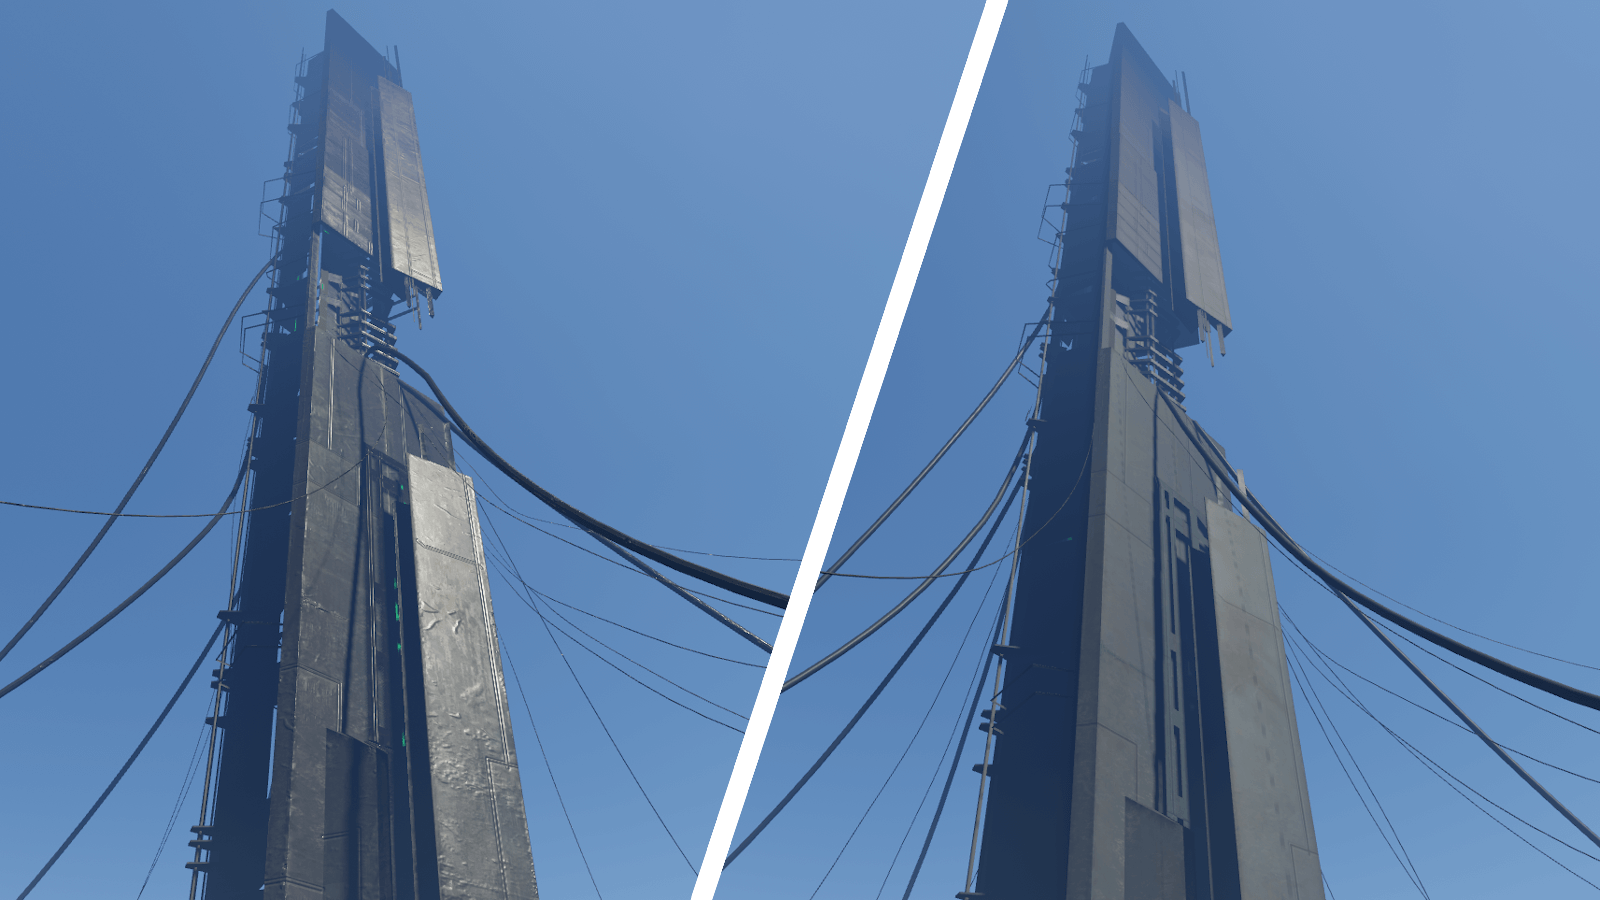
Before everything was said and done, it had become apparent all of our changes were so far-reaching and extensive that it warranted it’s own re-release. So far-reaching were our changes, in fact, several already-released community maps would be broken by updating our previous workshop uploads. In the end, we decided it would be best to re-upload these updated asset packs as “Definitive Editions” while maintaining the initial workshop uploads for compatibility purposes. We look forward to seeing the creative ways the community uses our assets, updated or otherwise!
Art
Written by LVJohnFreeman, Graphic Artist & Team Management
While our dev blogs aren’t meant to be a media release like those which we did previously, we’ve decided to still open up a bit more on what seems like smaller parts of our overall art and show how we are approaching some nuances from the original game and more! Keep in mind this still isn’t a media release so there won’t be as much media for you to glance at just yet, it will be strictly an example of how we do this stuff. Rest assured however, that media is coming very soon!
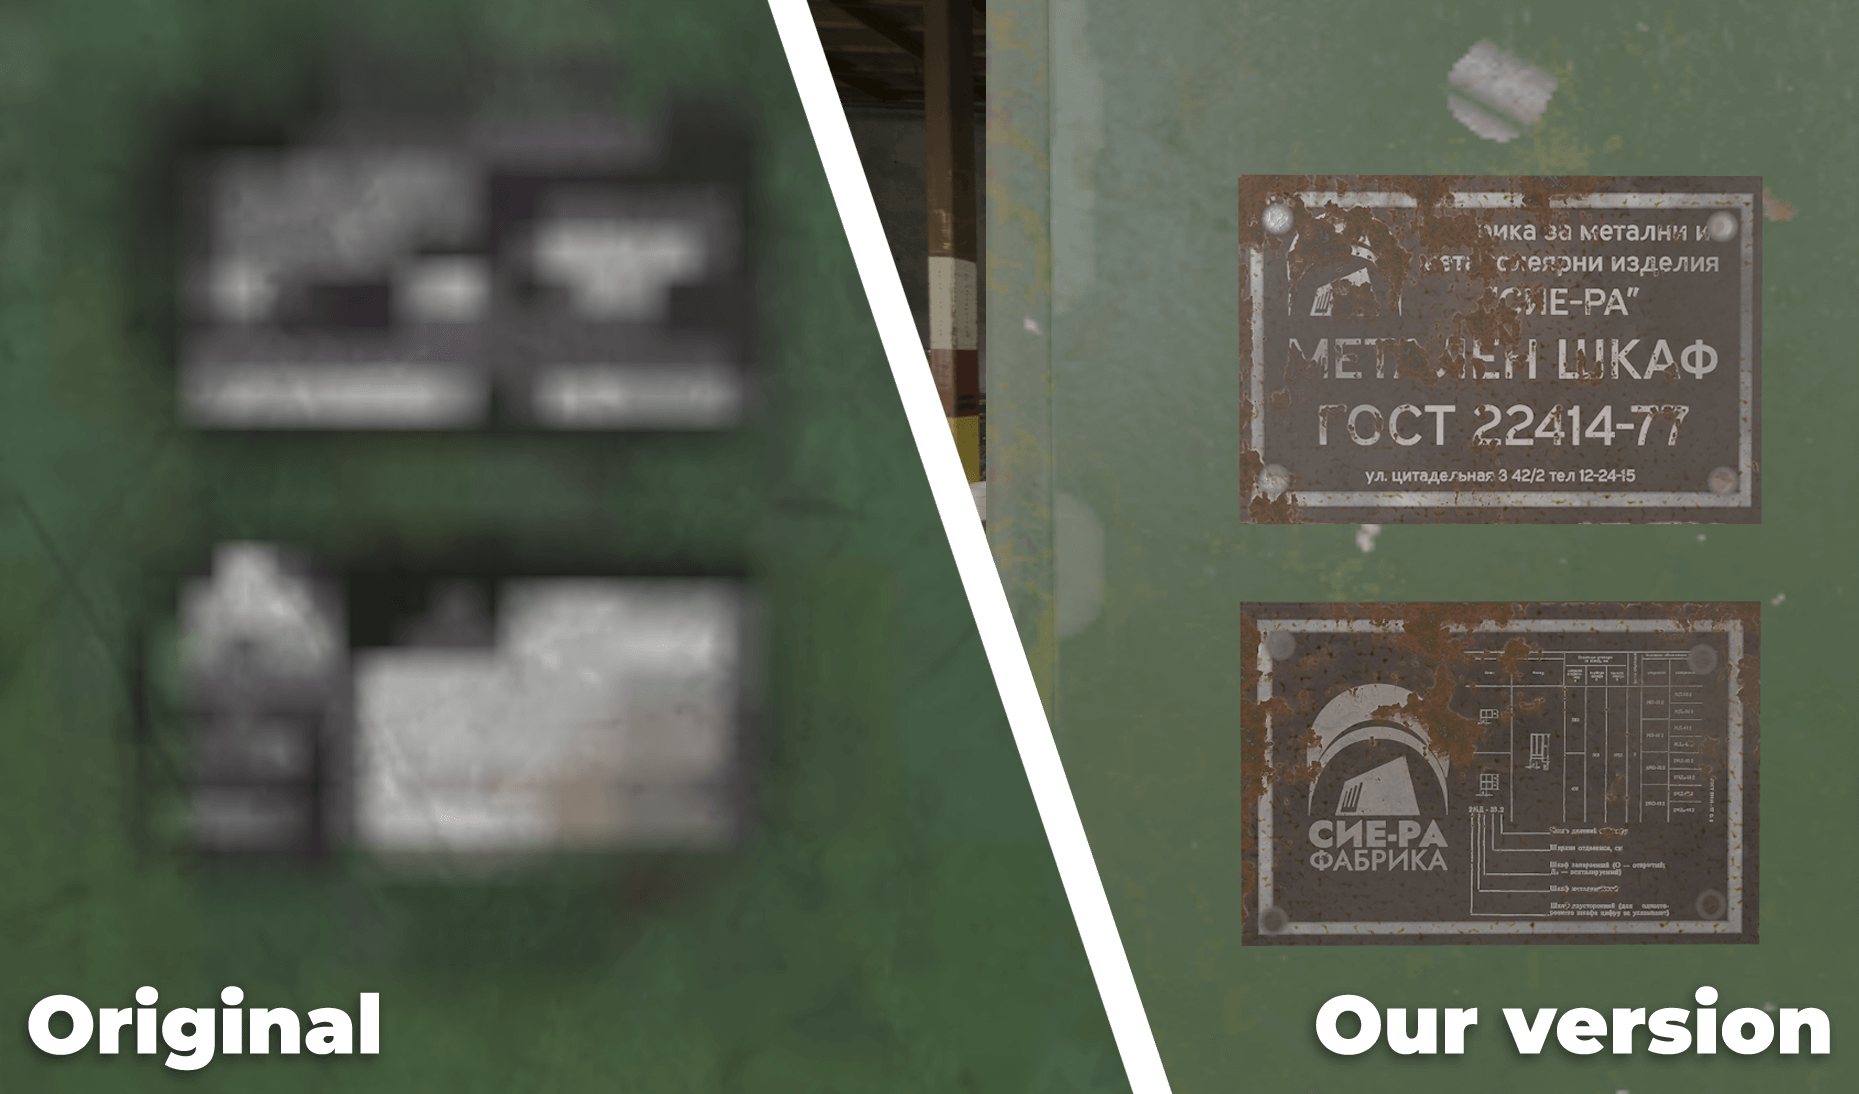
One of the things we’ve noticed very early on is that obviously due to the texture resolution we did not have a clear sight of what some of the branding looked like in the original game, what kind of information needs to be communicated or just plainly “what is this space being filled with”. Most of it in the original is either barely identifiable or it’s just so low res that we obviously have to reconstruct it to be feasible to see in VR, sometimes even in pancake.
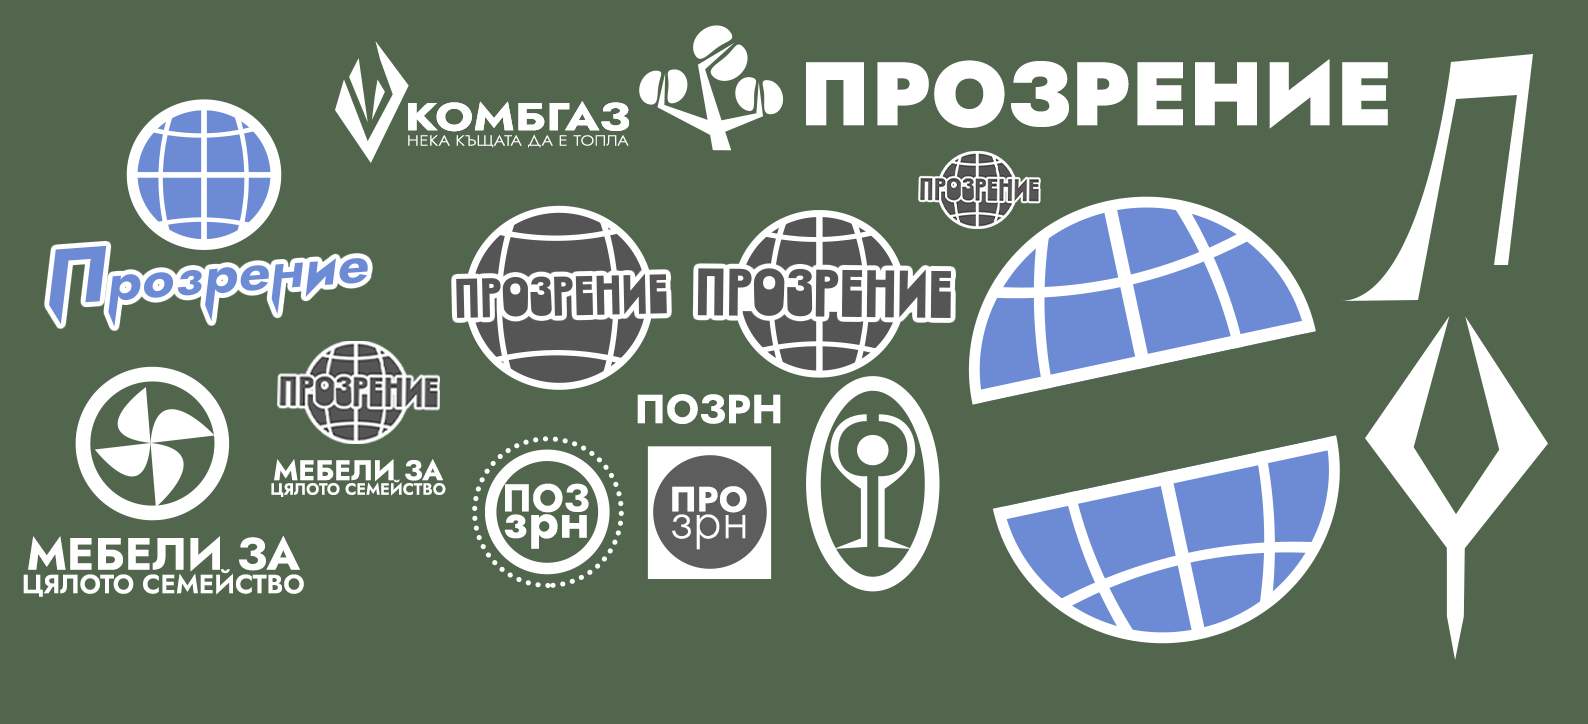
During very early stages a 2D artist goes on to create various functional very rough mock-ups which they communicate to the artist on the asset itself to make it as practical as possible. The result of which you can see below.
A lot of times we are just having a lot of fun with it and making something that fits both the world of both Half-Life 2 and Half-Life: Alyx. That means taking inspiration from various lesser known Soviet and Western brands, and mixing that with our own flavor. Then there’s usage of Bulgarian language, Russian and sometimes English for the branding itself, text that is supposed to communicate the purpose of an item and so on. One of the more obvious examples of how we try to be true to the original thematically would be some of the locations, perhaps even a street name established within Half-Life: Alyx itself? You go find that out!
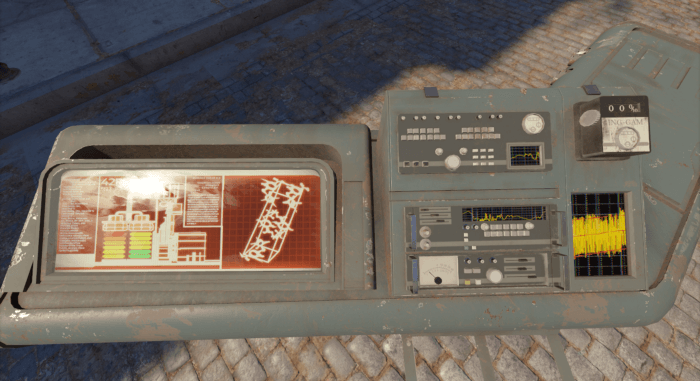
And then there’s this more nuanced, close to the original work that has to be done to make it all work.
Most of the work put into something like this takes some careful observation of what the original was showing and if it’s possible to be reconstructed in a way that works for us in terms of visual clarity and similarity to the source material. We then apply this method to a lot of stuff that the player can stick their heads into and glance at and I personally would like to give it that “fresh, but familiar touch”. It’s a small touch, but it’s definitely something that stuck in my brain after many years of playing and re-playing Half-Life 2.
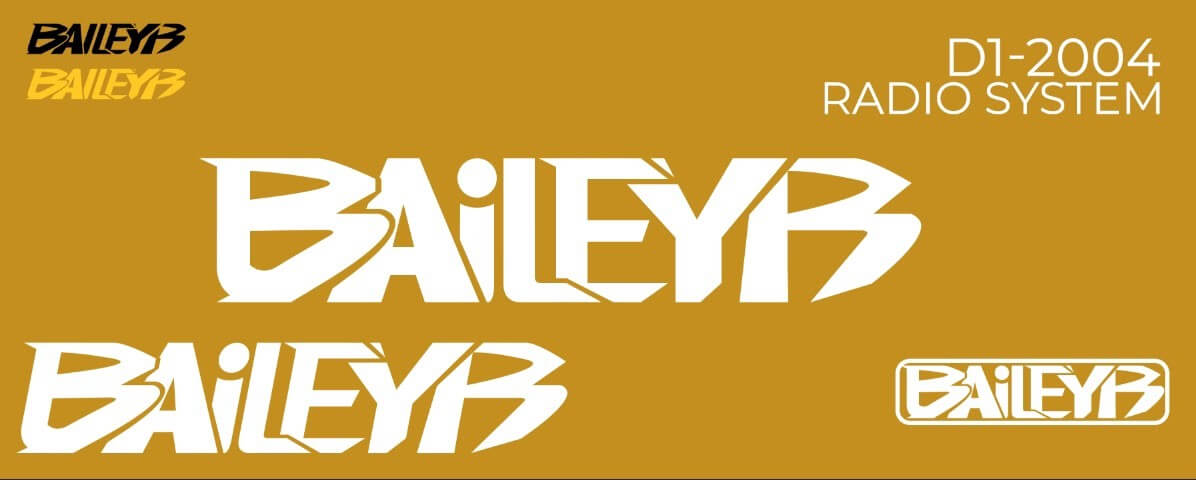
Sometimes however we construct something from the ground up completely, but something that would still fit and be of use to both us with Project 17 and when released to the public. This can range from small visual additions to very fun interactable assets, that you’ll get to play with and/or use yourselves. Let’s see what our process looks like, shall we?
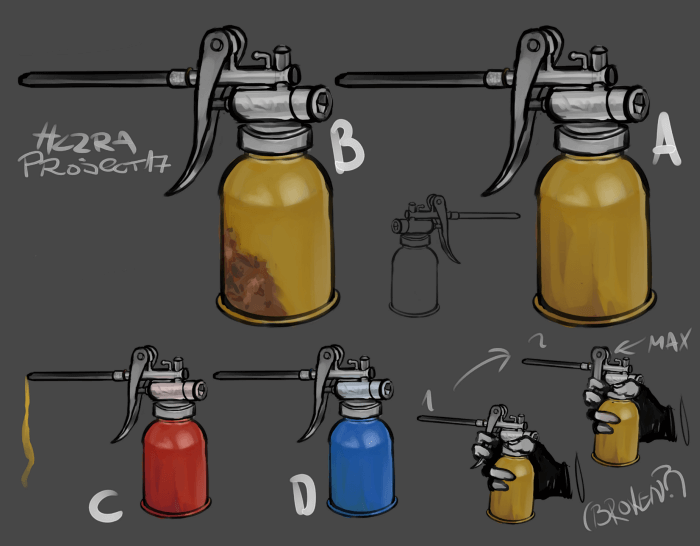
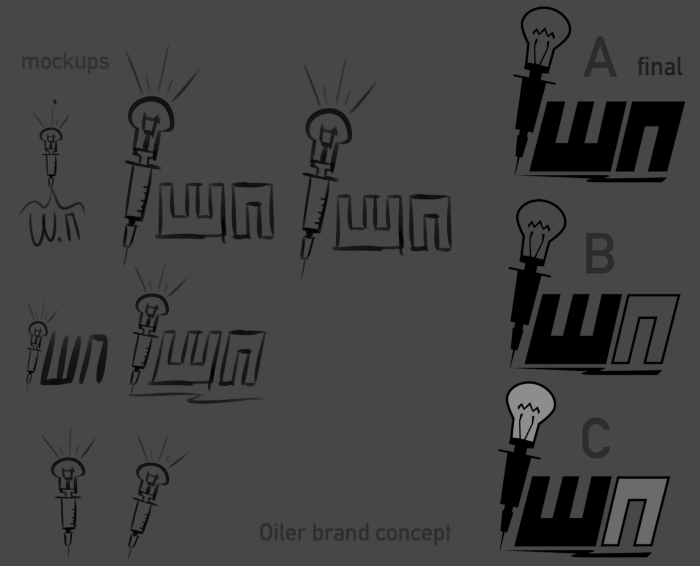
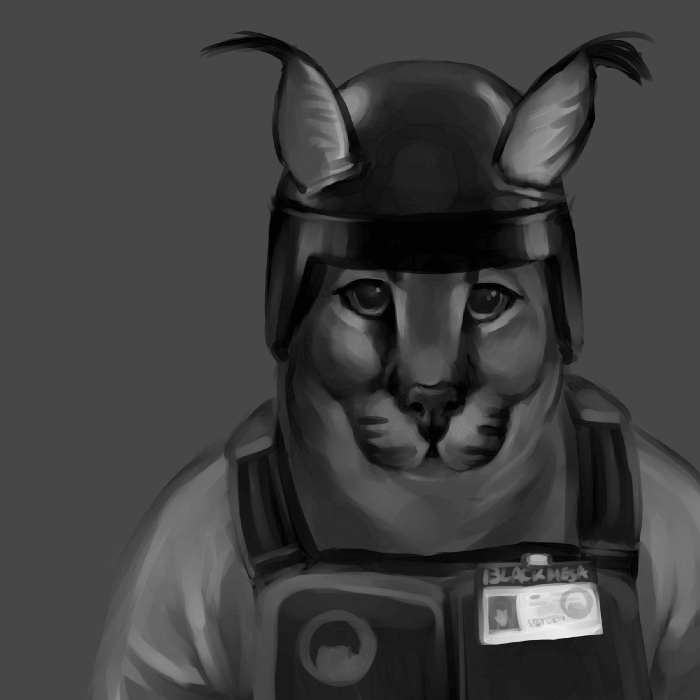
Here we have a concept piece that communicates to a 3D artist how a specific unique asset could look like, and what could be the functioning traits of the asset. Then as previously pointed out, to fill in the blanks the same 2D artist if necessary makes a functional mockup of what the brand or filler imagery could look like. In this case it’s the brand of our oiler.
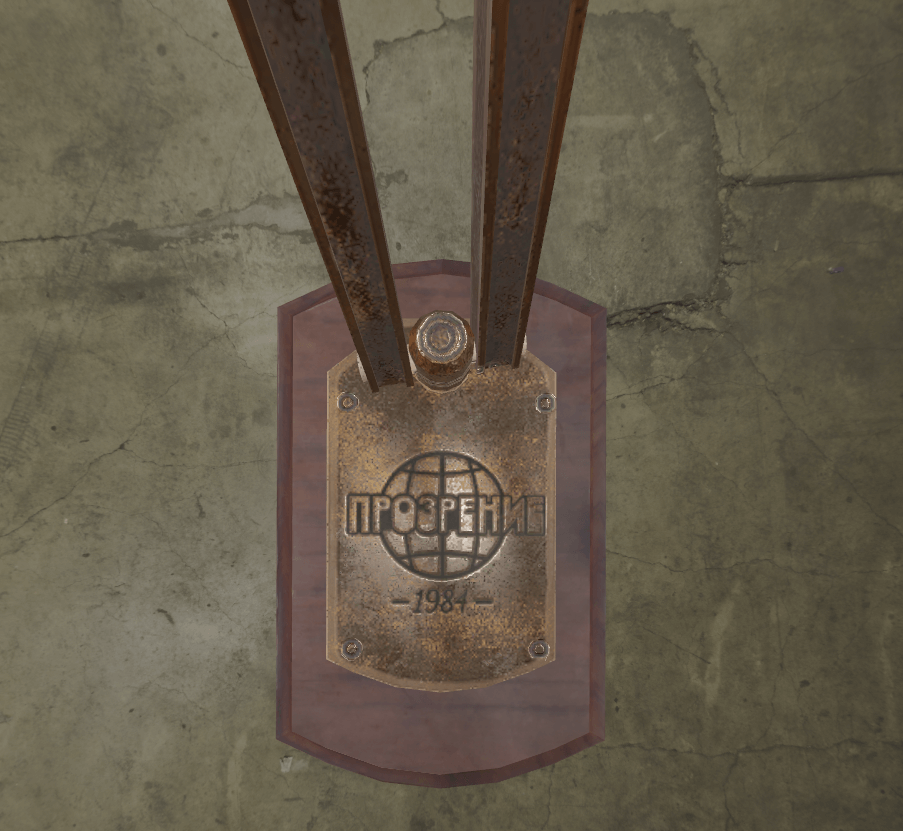
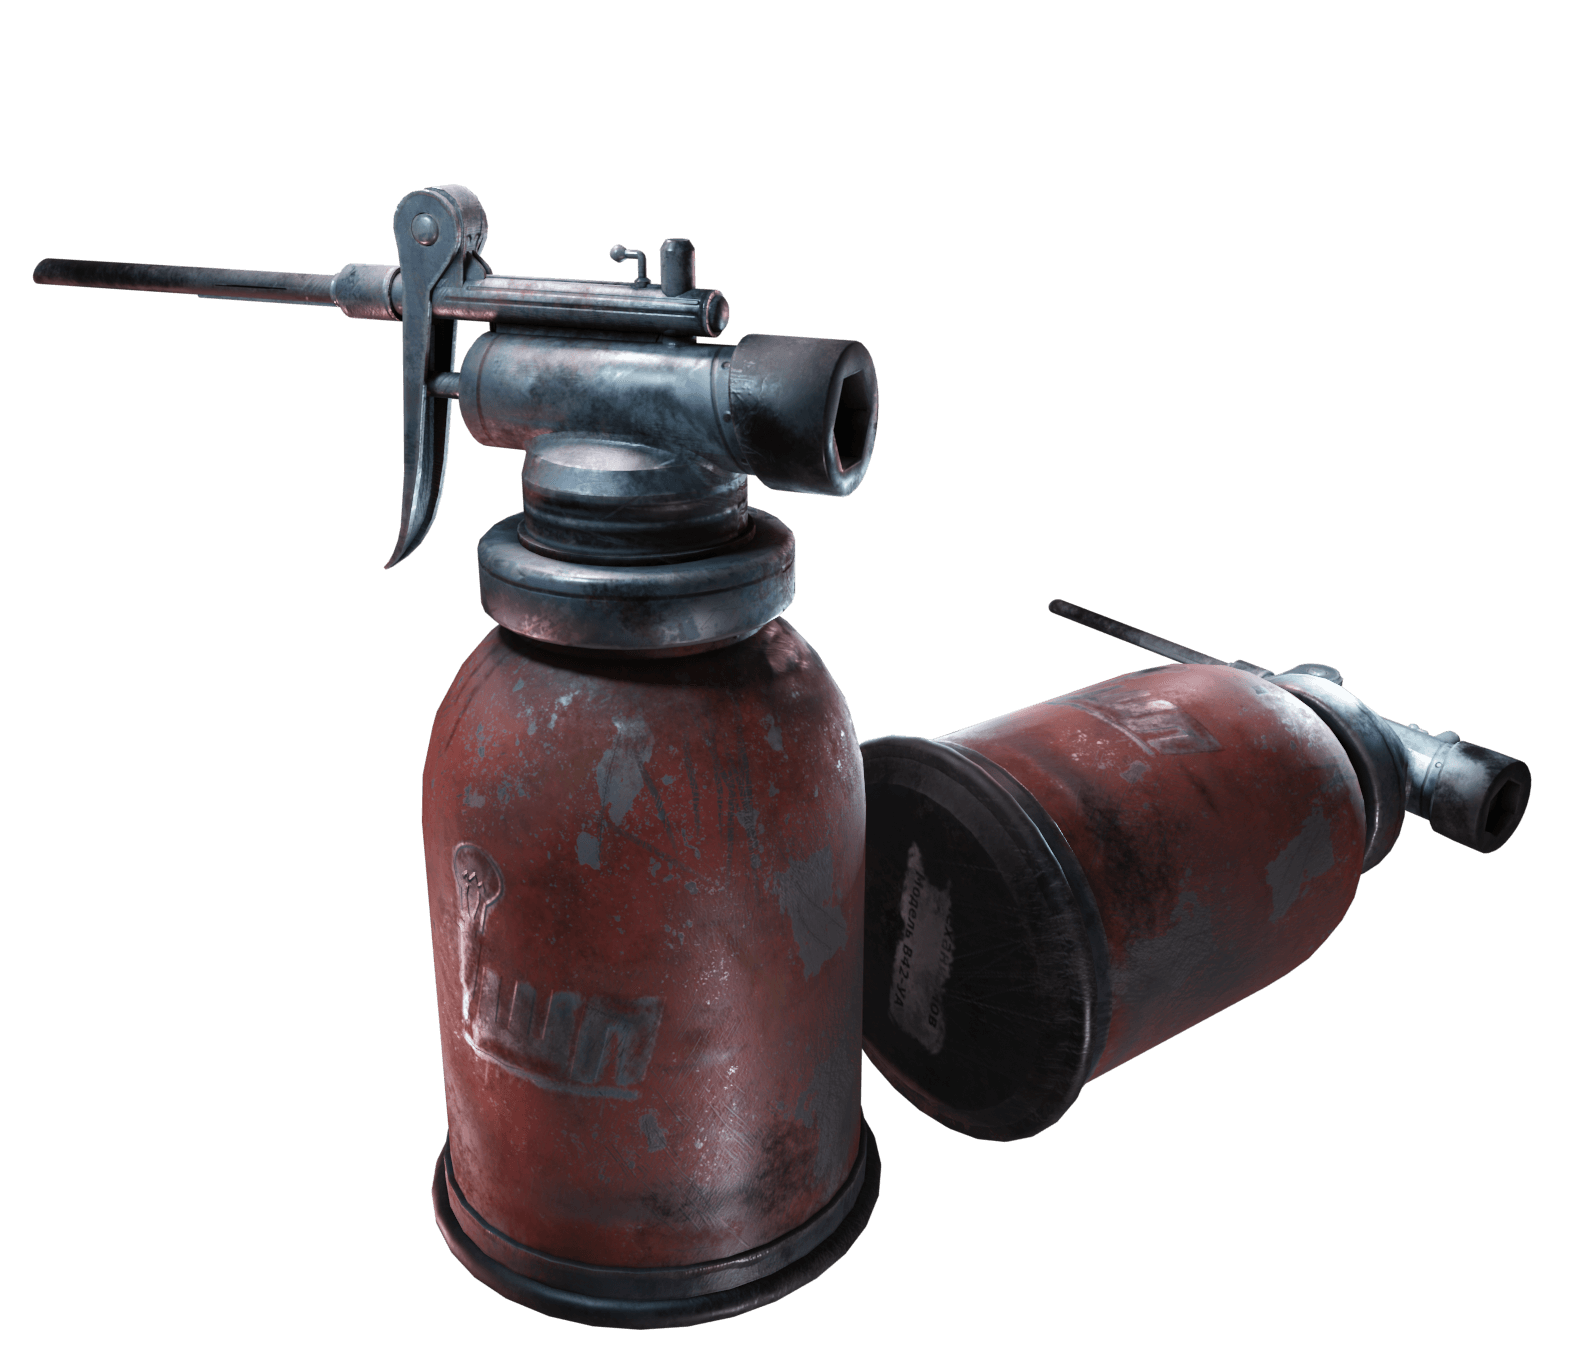
The 3d artist then does their magic and we end up with a brand new, finished asset for you guys to have fun with. Simple as that!
Technical Breakdowns
Written by Sonop, 3D Artist
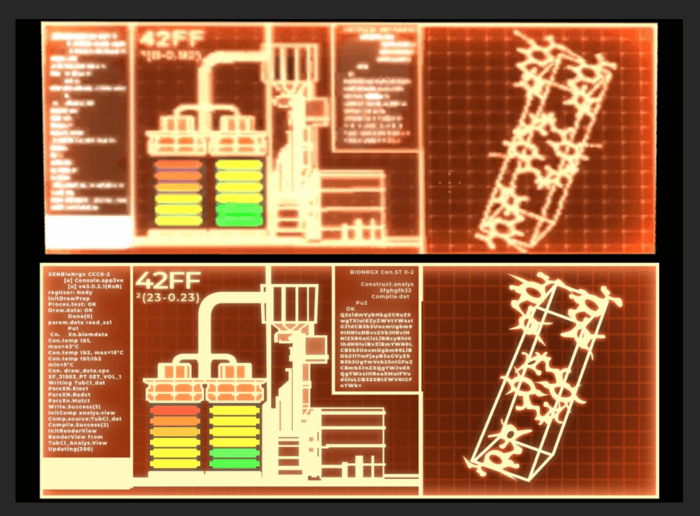
Given the scope of Project 17, we found ourselves in need of a sufficiently ‘liquid’ material to flesh out particular sequences. Those of you who are more embedded in the Source 2 community already know that the currently public branch of Source 2 does not include a liquid shader in the same way that Half-Life 2 does. Nor does it include any logic to go along with any water volumes you may want to have in your custom campaigns, and this remains one of the largest hurdles to custom content creation in the Half-Life: Alyx community. While we’re still developing an acceptable solution for the logical side of water volumes, we’ve put together a technique for creating something that at least looks like water.
Since the ability to create custom shaders still isn’t available to us as part of the current Half-Life: Alyx tools, we actually leverage the same shader that Valve uses for their bottles with liquid inside them. Key changes being that the material is set up such that it won’t react to being ‘tilted’ and remain ‘full’ at every orientation, while utilizing an animated texture.
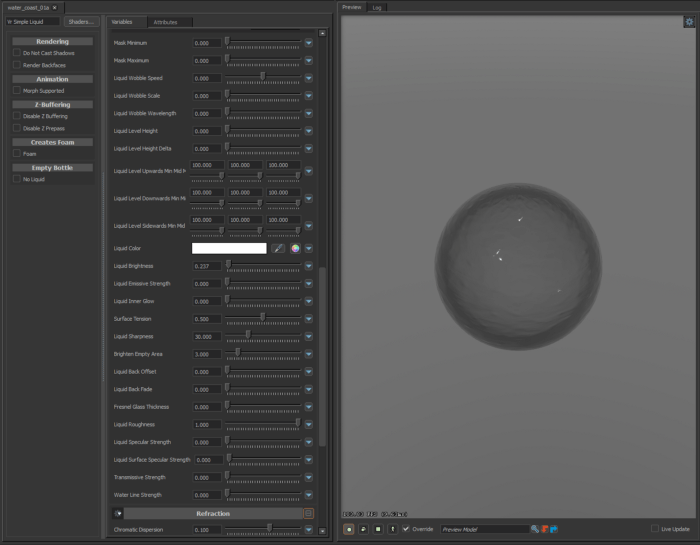
One of the biggest drawbacks of not having access to shader tools in Half-Life: Alyx is that this is still very much a ‘jury-rigged’ technique to get water in-engine. Refraction and reflection is a big pain point in this process, as these rendering processes do not work as they did in Half-Life 2. Key point being that the level’s cubemaps are utilized in order to get somewhat proper refractions and reflections, which gives good results but aren’t real-time. Meaning that, unfortunately, liquid surfaces done this way won’t be reflecting props or characters in real-time, just the level geometry itself. Considering this is such a finicky process, we’re still refining this technique and hope to make the results much more reliable for the public before release. This does, however, already provide very good results for particularly use-cases within Project 17.
Technical Breakdowns - Part II
Written by Chuck, Material Artist
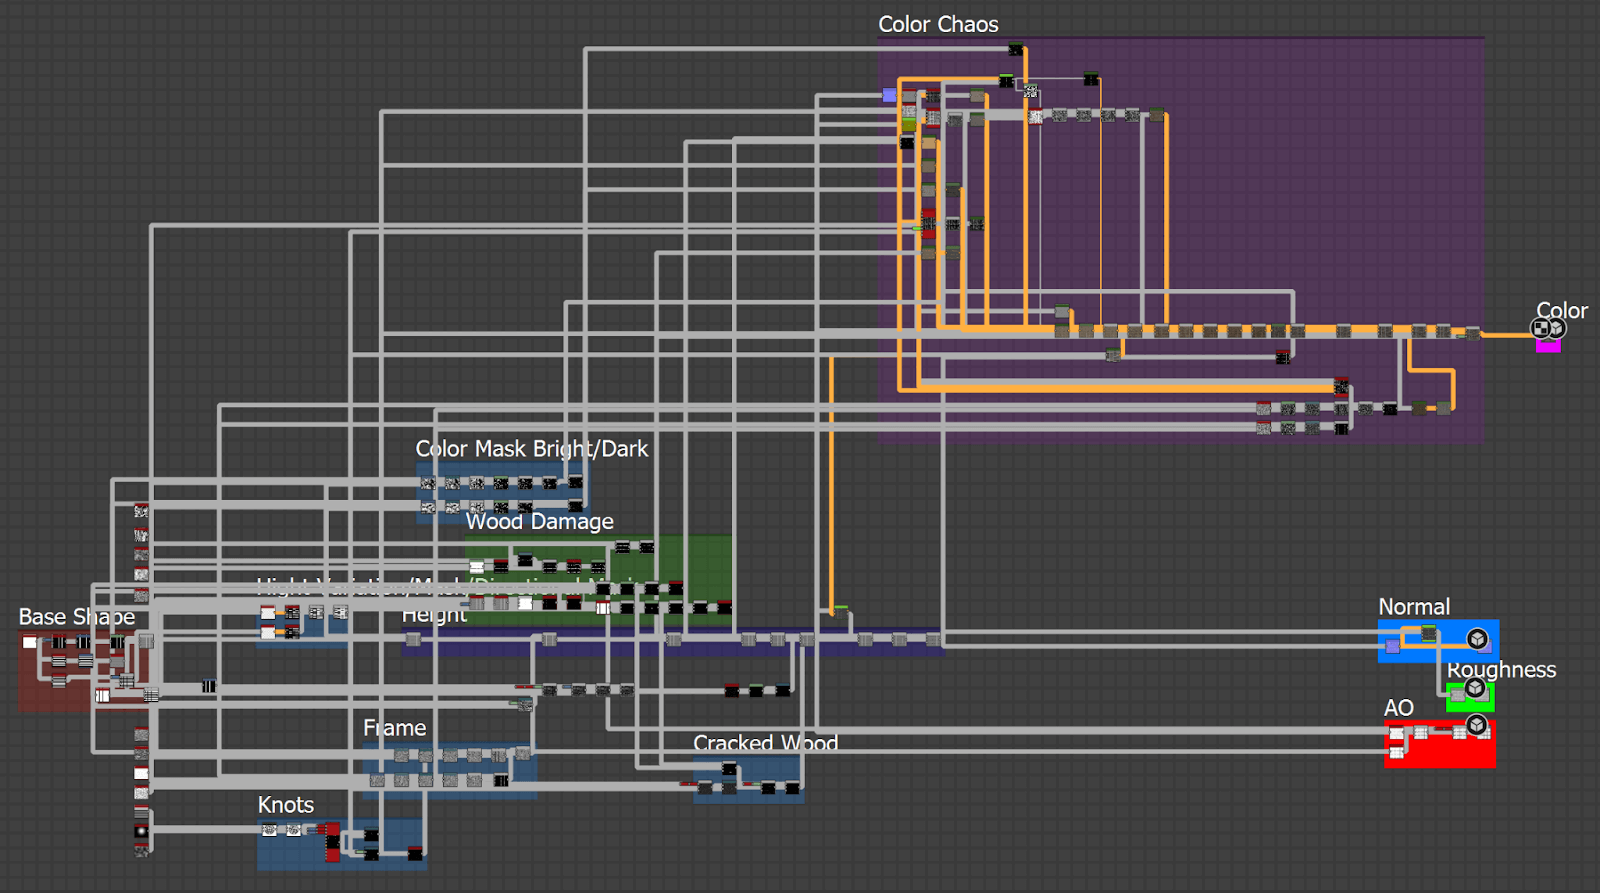
On our journey to faithfully recreate Point Insertion while leveraging modern hardware to bring new beauty to the experience, one major point are the dated environment textures of Half Life 2. Made with an obsolete specular workflow, and oftentimes missing even normal layers, they lack the detail to be directly used in a next-gen first person game, VR or otherwise. Source 2, however, uses a modern PBR rendering technique and as such we’ve found a comfortable workflow using the Substance suite of tools. In the case of recreating world textures, I use Substance Designer, a node-based procedural material creation software, that enables you to iterate in seconds and create nearly infinite variations of your material. In conjunction with Source 2’s hot-loading feature for materials, this allows us to work in the engine’s natively available PBR workflow and see changes in-engine literally seconds after you made them in Substance Designer.
So how does Substance Designer work and how do a bunch of nodes create a game ready texture when you are done?
Let’s have a look at a part of a texture we are including in our next update.
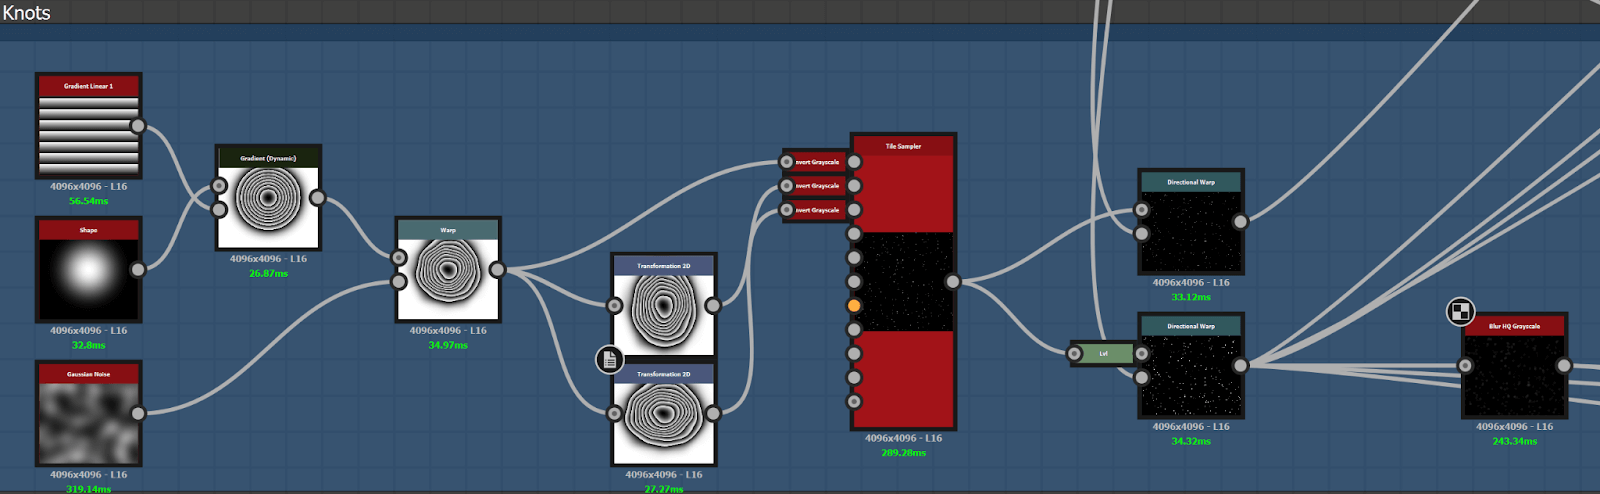
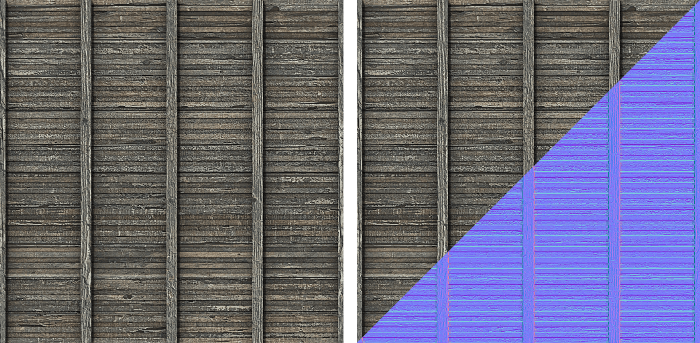
In this picture we see how the knots of a wood texture can be created in substance designer. Each node is dependent on the nodes that feed into their inputs. You can read this from left to right.
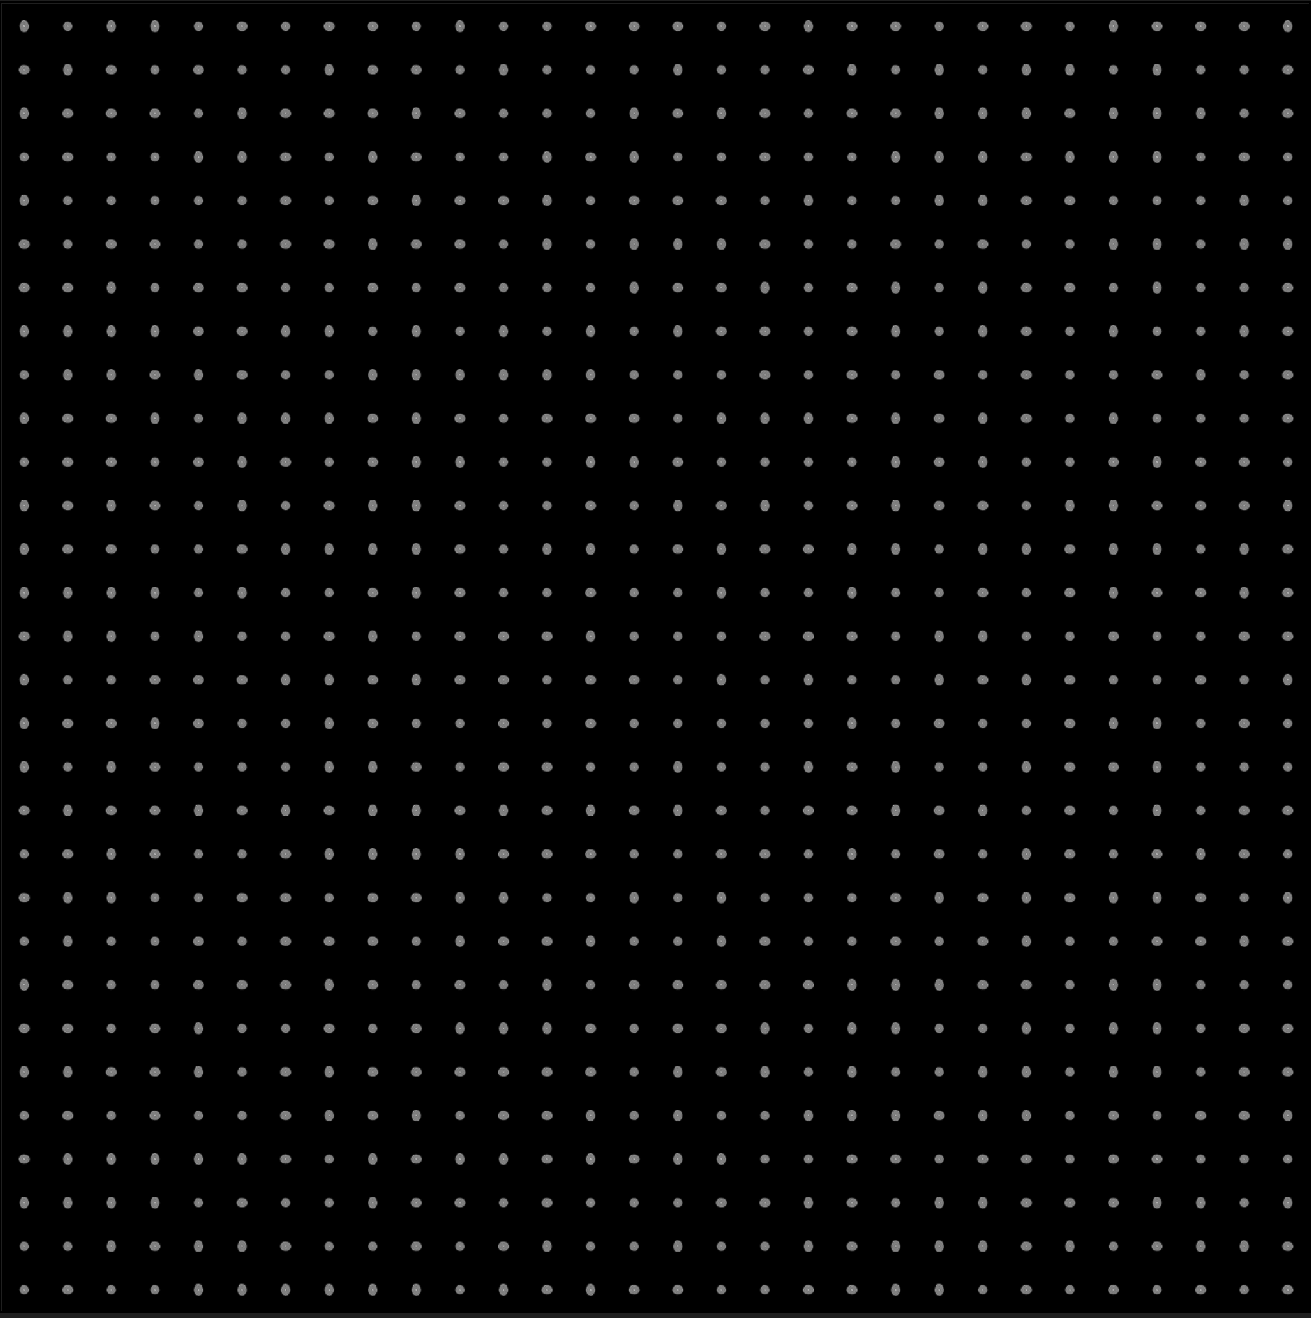
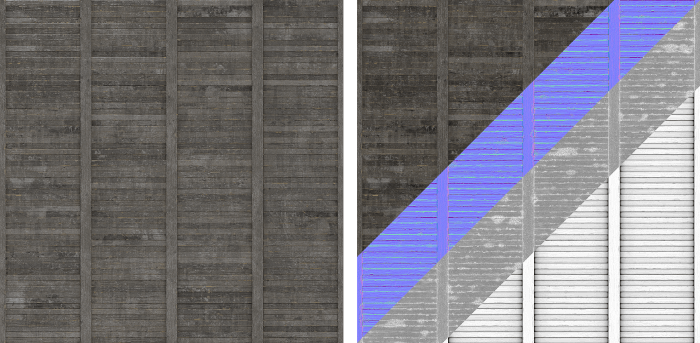
Now if we use certain options like position random, scale random, or rotation random we can create a random placement of those wood knots on the texture. Like this:
This is just one example of how you combine nodes in substance designer to get to a certain result. And the beauty of it is, that everything can be changed.
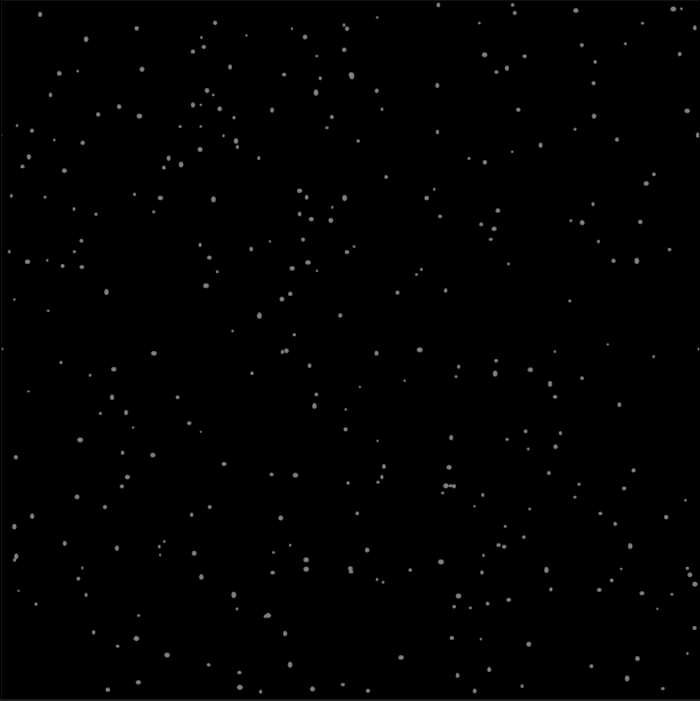
Not enough knots? Increase the amount in the tile sampler.
Too small? Increase the size in the tile sampler.
Not enough variation? Add an input to the tile sampler and create another version that you can plug into the newly created input.
Node systems are really versatile and changes at the very front propagate through the whole node system. If set up carefully, this allows you to create materials that can easily be changed to anything the artist requests with only as much work as moving a few sliders.
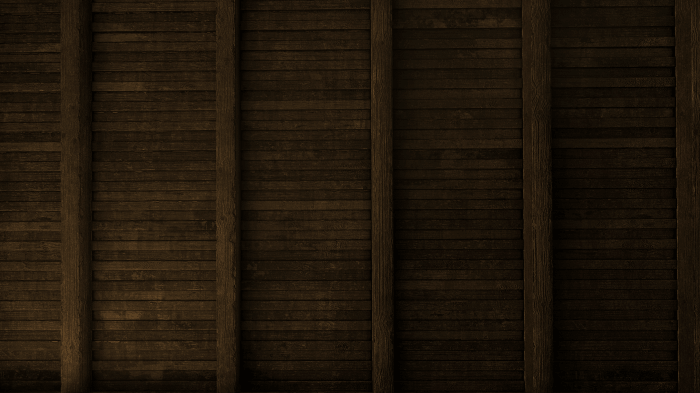
Last but not least a few pictures to showcase the final texture.
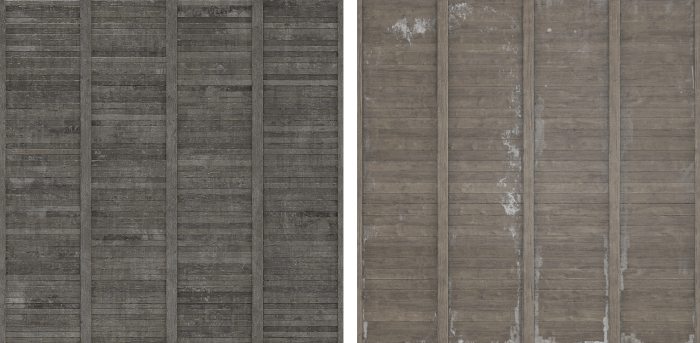
One thing to notice is that the recreation will never look exactly like the original. So while it is really fast to get closer to the original with every iteration your node graph gets more and more complicated. Also specific patterns like rust on a metal surface or cracks on rock might not be achievable in the same pattern because of its procedural nature.
Project 17
Written by MDDBULLDOGG, Team Lead & Level Design

Our team is made up of the kind of people who love to get lost in their art and we oftentimes find ourselves forgetting that we should be giving some kind of progress updates as we go along. Our most recent bout of silence can attest to that. But you can rest easy knowing we’re still full steam ahead and have plenty saved up to show you. A lot of which you’ll be seeing very, very soon.
For Project 17, progress is steady and ongoing. The entire playable space of Project 17 is at least greyboxed, with several areas already having several art passes done on them. This means that all of Point Insertion and the beginning of Red Letter Day are walkable from start to finish. This also means that we can get into the nitty gritty details of each area and start having fun with prettying it up for everyone to see! Since this is a dev blog however, we’ll fill you in on some of the technicals rather than drowning you in pretty pictures. Worry not though, you’ll get those pictures soon.
Within the scope of Project 17, we actively look for opportunities to further refine the experience for the players. At the end of the day, we want to pull the player into the world of Half-Life as much as we possibly can. Especially considering our VR focus, that means we don’t want to pull the player out of the experience unless we absolutely have to. To this end, we’re doing our best to reduce loading screens, since nothing pulls you out of the experience quicker than being told “hold on while we pull this other data”. Naturally, this comes with it’s own challenges.
We’ve experimented with combining as many of the original maps as possible, but the most promising thus far has been d1_trainstation_03 through 05. Most of you will remember this as the section starting from when Metrocops begin storming the apartment complex, going all the way to Kleiner’s lab.
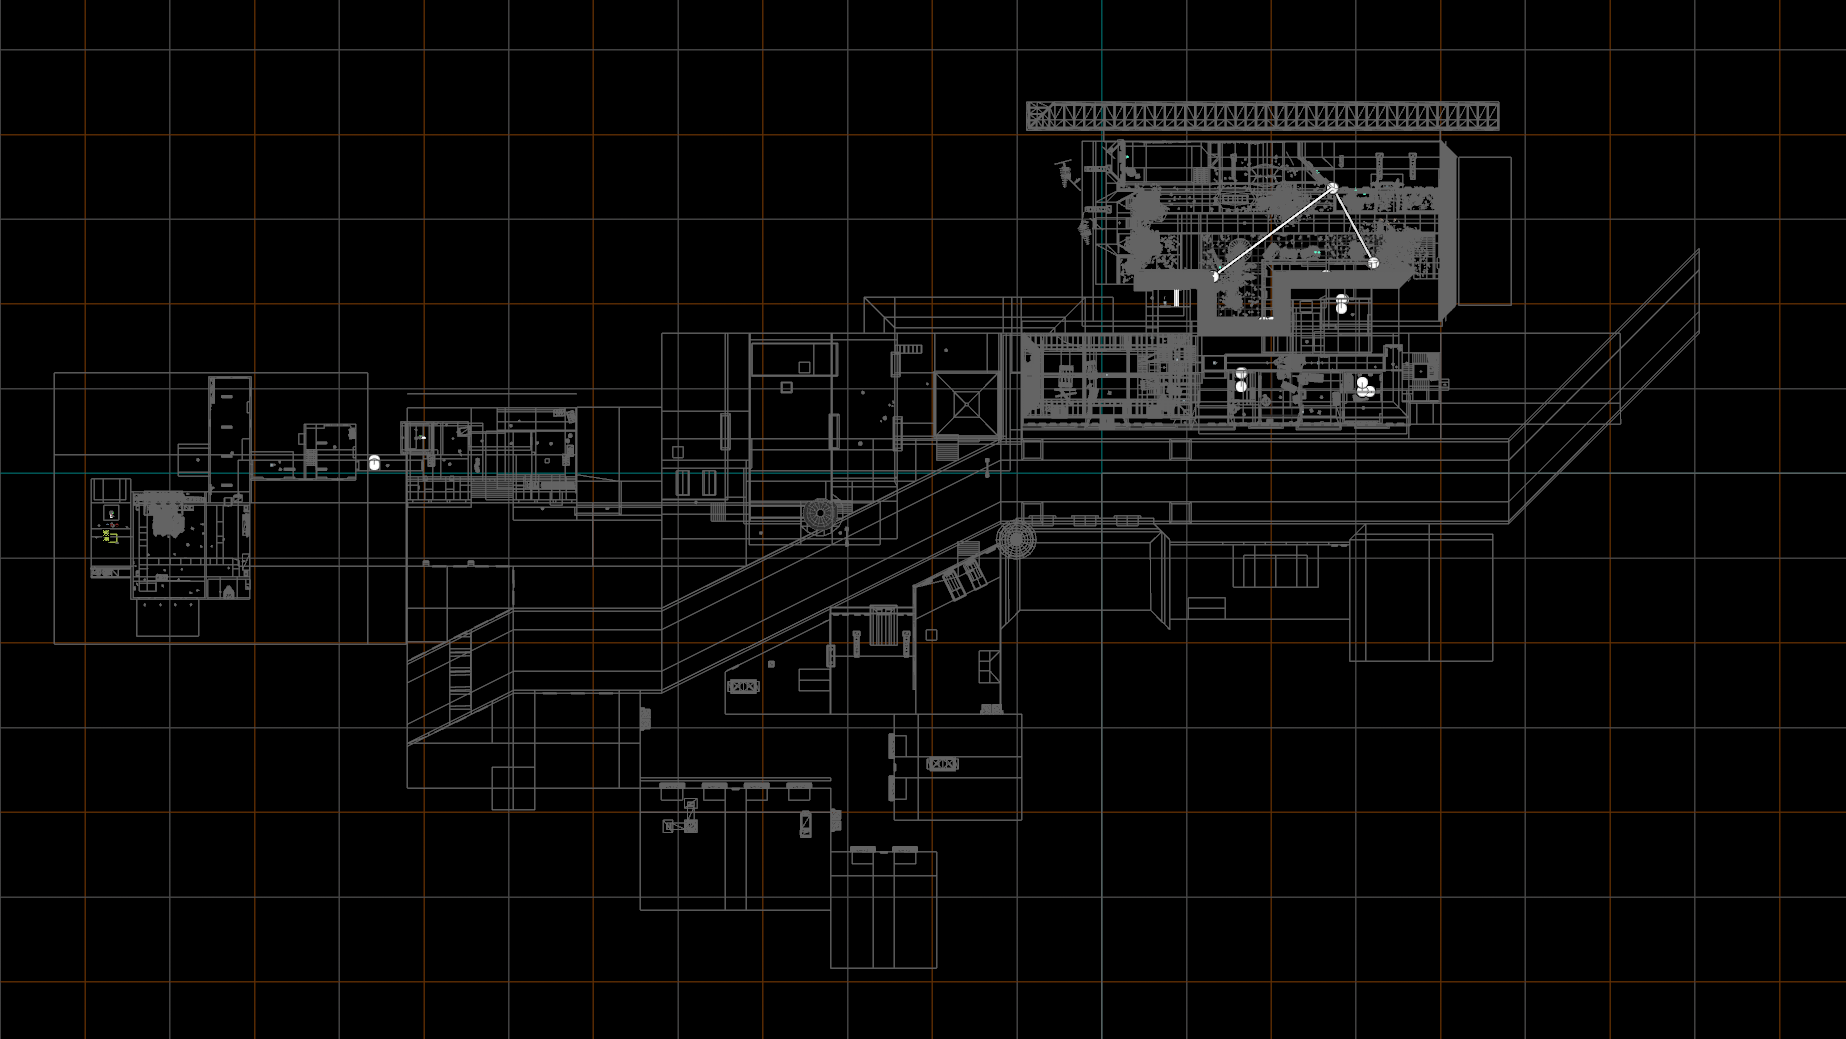
This particular section has proven promising for several reasons. Chiefly, the original maps physically keyed together fairly easily, requiring only minor modifications to each map before they fit together cleanly, with the actual playable space remaining entirely unchanged. In addition, the removal of the loading screens here, particularly the transition from the apartment complex to the rooftops, helps immensely with pacing. Given the advances in home computing hardware since Half-Life 2, we’re given much more overhead with the size of what we can pull in at once. Given that this is such a physically large area to be rendering all at once, it’s not feasible for us to just combine all these maps without taking precautions. Performance is always important, and doubly so for any VR experience.
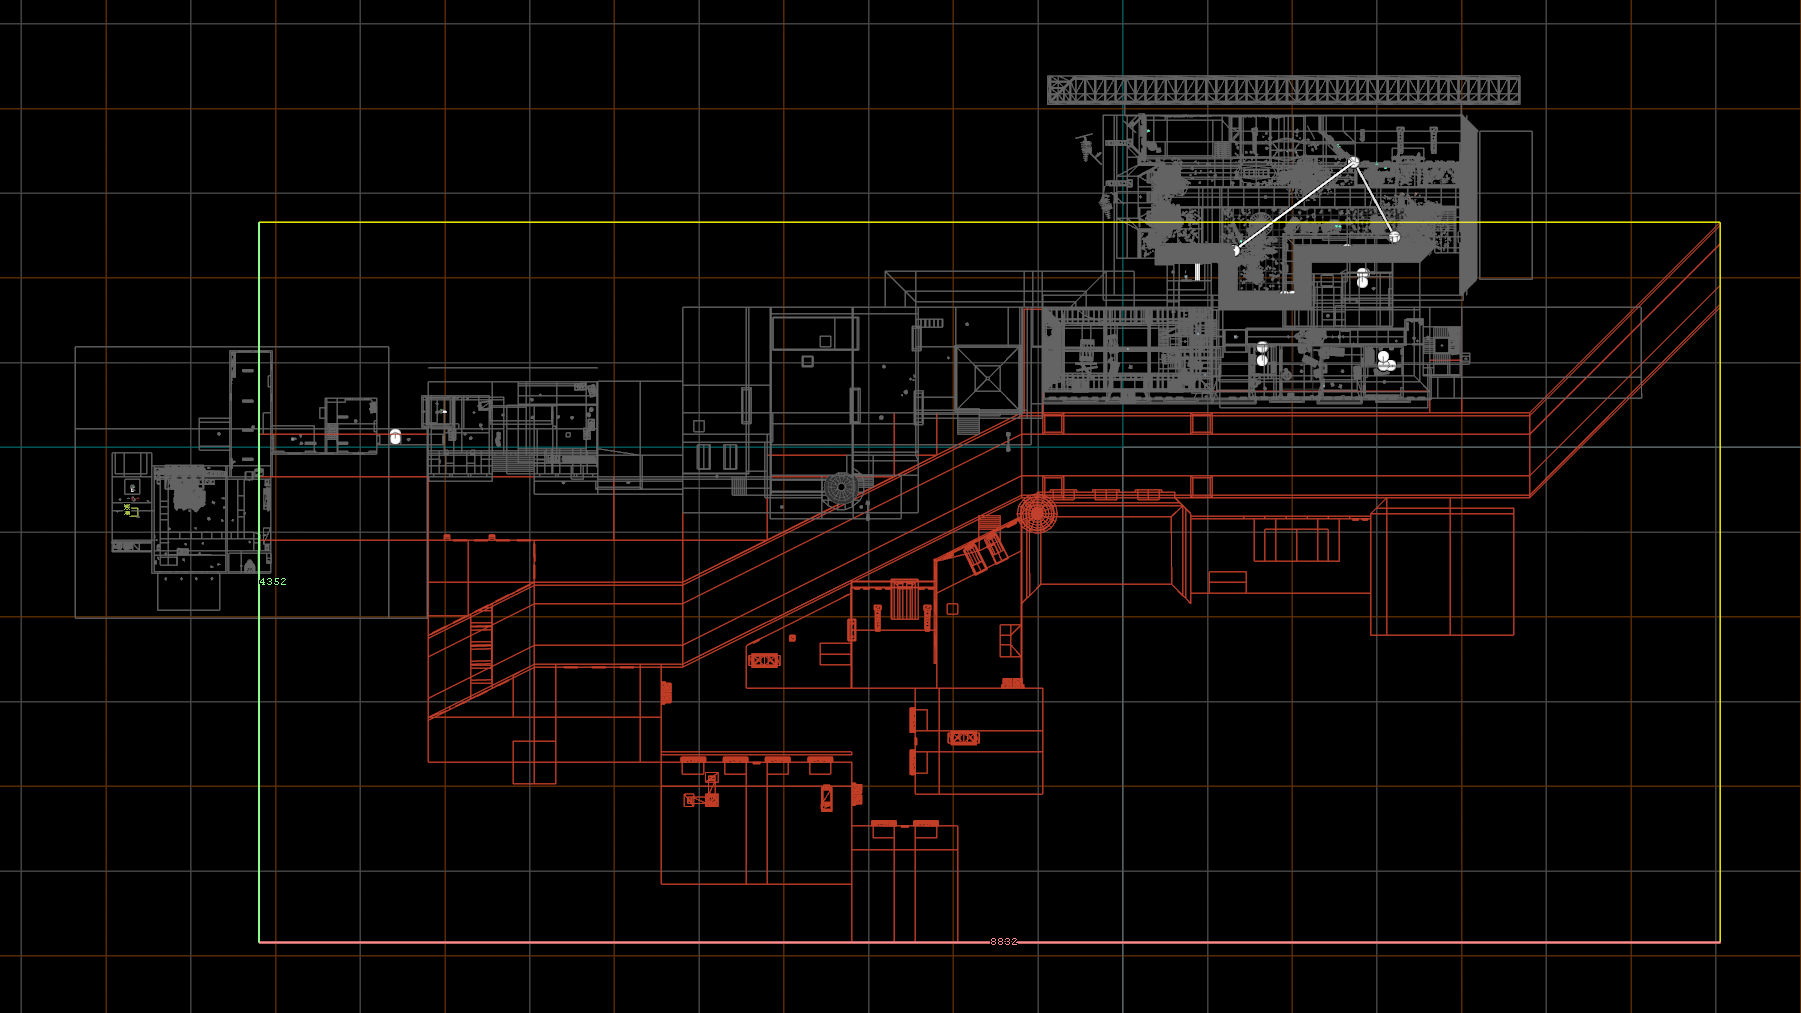
One of the biggest optimizations we’re performing here takes direct advantage of some of the new features that Source 2 provides us. In order to preserve performance during this section of our project without sacrificing visuals, we’re separating as much as we can into a 3D skybox. In comparison to Source 1, Source 2’s feature set allow much more flexibility when it comes to what you can include in a 3D skybox. With native scaling of prop_ entities, you can essentially create a map in normal scale, and then apply a global scale modifier to that in order to create an area that the player doesn’t physically interact with, but retains the visual fidelity of an area that’s playable. Given the immense area of this section that isn’t actually reachable by the player, we’re putting as much as we can into the 3D skybox in order to preserve visual fidelity in the playable space without tanking performance. This is a huge player in how we’re optimizing what we’ve been calling the ‘rooftop run’ section of Project 17.
With the fact that all of our areas are at least greyboxed out, this means we’re beginning to run tests on animation and choreography for our scenes. While still very early on in the process, we’re beginning to form a style and identify areas which are ripe for re-interpretation. Spinning that process up opens several opportunities for our team to continue to grow and expand into those fields.
Given the increased focus on creating animations and choreography sequences, in conjunction with our workflows being properly organized, we have one more big piece of news:
Help Wanted!
Both the Project 17 and Half-Life 2: Remade Assets teams are looking for motivated volunteers to bolster our ranks! Every position is open from Discord Moderators to Programmers, but we’re particularly looking for the following positions to help push our team into the future:
If you’re interested in being part of expanding the VR playspace, through Half-Life and beyond, please send in an application! We’d love hear from you!
See You Soon
Don’t think that’s all we have for you, now.
We’ve been very busy since our reveal trailer, and have a lot to share with all of you. Keep an eye on our Twitter and Discord for important news coming very soon. We can’t wait to hear what you think.
Copyright © Project 17 Team 2024
Project 17, Project 17 Team, and/or Orbifold Studios are not
affiliated with Valve and/or Valve
Software® in any way, shape, or form.
Steam, Half-Life,
Half-Life Logo and the Steam logo are trademarks and/or registered trademarks of Valve Corporation © in the
U.S. and/or other countries.